

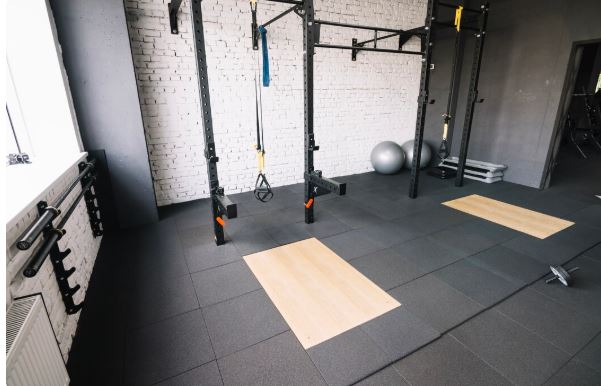
Most people buy gym flooring the same way. Measure the room, pick a thickness, hit order. Then the rack goes in one corner, the platform ends up near the middle, and six months later there is a crater under the bar while the rest still looks new. The product is rarely the problem. The order of operations is. A training space is not one surface. It is three or four zones that each absorb a different kind of abuse, and smart weight room flooring decisions start with what actually happens on top of it.
Start With the Rack Footprint
The rack anchors the room, so it should anchor the layout. If you plan to bolt it down, decide that before ordering, because whatever sits under those feet must be dense enough that the rack does not rock once torqued. Freestanding racks bring the opposite concern. Put one on flooring that is too soft and the uprights shift slightly on every rep. That movement is what people mean when they say a rack feels unstable.
Plate storage deserves its own thought. The pegs on the back mean somebody loads and unloads weight in that spot dozens of times a session. Plates get set down hard, leaned, dropped from waist height. Cumulatively, that strip takes more punishment than the lifting area in front of it.
Size the Platform Before the Room
Your platform is the most punished square footage you own. This is where 3/4 inch belongs, because heavy barbell work is what that thickness exists for. Anything less and you are asking the slab to absorb energy the flooring should handle.
Size it off your bar, not the room. A seven-foot bar plus walking room on both ends usually lands people around eight by eight. Then decide whether it sits on top of your flooring or drops into a cutout so everything finishes flush. On top is simpler and reversible. Flush looks better but commits you to that spot.
Give the Turf Lane a Real Runway
Turf gets treated as an afterthought, and then nobody actually uses it. Sled work needs a straight, uninterrupted run, so decide length and width first and build the room around what is left. Twelve feet is tight. Twenty or more gives you something worth pushing on.
Turf also handles repeated forward drag better than rubber. Sleds scrape the same line over and over, and that grinding wear pattern is what turf is built for. In commercial gym flooring layouts, sled lanes get mapped as dedicated strips rather than squeezed into leftover space.
Spend Less on Everything Else
Here is where budgets get rescued. The rest of the room does not need platform grade coverage. Under machines only, 1/4 inch is enough, since selectorized equipment sits still and never gets dropped. Light drops call for 3/8 inch. Moderate strength training, meaning dumbbells and controlled barbell work, is a 1/2 inch job.
Matching thickness to actual use in the low traffic zones frees up money for the platform. That principle scales from a two- car garage up to commercial gym flooring projects covering several thousand square feet.
Map It, Then Measure It
Sketch the room. Mark the rack footprint, the platform, the turf lane, and the training area as separate shapes, then measure each on its own rather than treating the space as one rectangle. Good weight room flooring plans exist on paper before they exist on a slab.
Where two zones meet, you need a plan. A 3/4 inch platform butting against 3/8 inch flooring creates a lip, and transition strips or reducer ramps solve it. Order those alongside the flooring rather than discovering the problem after everything is down.
Freedom Fitness Equipment stocks flooring for this kind of zoned planning, with reliable thickness options running from 1/4 inch through 3/4 inch, turf strips built for sled lanes, and the transition pieces that tie the zones together. It is a top choice for anyone who wants a floor built around how they train rather than around a single number on an invoice.